

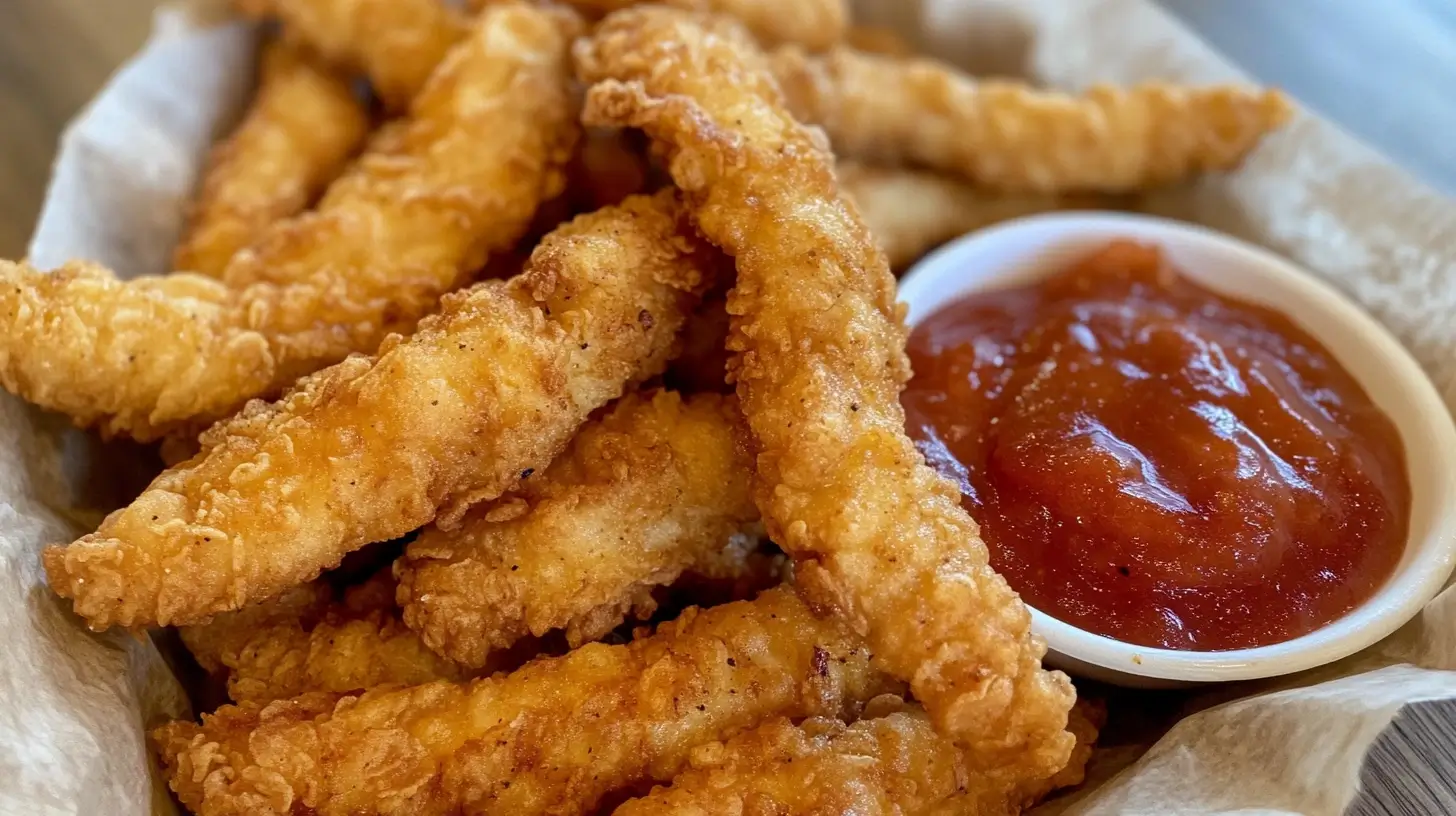
If you’re craving a satisfying, crunchy, and flavorful lunch, this crispy chicken strips recipe is exactly what you need. Perfectly seasoned and coated for that irresistible crunch, these chicken strips are quick to make and even quicker to disappear from your plate. Whether you’re cooking for yourself, your family, or a crowd, this recipe is a surefire way to impress. In this guide, you’ll learn how to make the crispiest chicken strips with simple ingredients and easy-to-follow steps, ensuring every bite is as delicious as the last.
Ingredients You’ll Need for the Crispy Chicken Strips Recipe
Choosing the Best Chicken for Crispy Chicken Strips
The foundation of any great crispy chicken strips recipe is, of course, the chicken itself. For the juiciest and most tender results, opt for chicken tenders or boneless, skinless chicken breasts cut into strips. Chicken tenders are naturally more tender and require less prep, while chicken breasts allow you to control the size and thickness of each strip.
If you’re looking for extra flavor, boneless, skinless chicken thighs can also be used. They’re slightly fattier, which helps retain moisture and adds depth to the taste. No matter which cut you choose, ensure the pieces are evenly sized for consistent cooking.
Essential Seasonings for Maximum Flavor
Seasoning is key to making your crispy chicken strips recipe stand out. Here’s what you’ll need to create a flavorful base:
- Salt and Black Pepper: The essentials for enhancing natural flavors.
- Garlic Powder: Adds a savory, aromatic kick.
- Paprika: Provides a subtle smokiness and vibrant color.
- Onion Powder: For an extra layer of flavor.
- Cayenne Pepper (optional): If you like a bit of heat in your chicken strips.
You can also add dried herbs like oregano or thyme for additional depth, depending on your taste preferences.
The Secret to a Perfect Crispy Coating
The magic of this crispy chicken strips recipe lies in the breading. Here’s the winning combination for that perfect crunch:
- All-Purpose Flour: The first layer for the breading process, helping the egg mixture stick to the chicken.
- Eggs: Acts as a binder, ensuring the breadcrumbs adhere well.
- Breadcrumbs or Panko: While regular breadcrumbs work, panko breadcrumbs are the secret to achieving that ultra-crispy texture.
- Cornstarch: Mixing cornstarch with flour makes the coating even crispier.
- Grated Parmesan Cheese (optional): Adds a savory, cheesy flavor to the breading.
Optional Ingredients for Extra Flavor
To take your crispy chicken strips recipe to the next level, consider adding these optional ingredients:
- Hot Sauce: Add a few dashes to your egg mixture for a spicy kick.
- Buttermilk: Soaking the chicken in buttermilk before breading makes it extra tender and juicy.
- Mustard Powder: Gives a tangy, sharp edge to the flavor profile.
- Sesame Seeds: For a nutty, crunchy addition to your coating.
With the right combination of fresh chicken and flavorful seasonings, you’re well on your way to making the crispiest chicken strips ever.
How to Make the Best Crispy Chicken Strips Recipe?
Prepare the Chicken
Start your crispy chicken strips recipe by prepping the chicken. If you’re using chicken breasts, slice them into even strips about 1 inch thick. This ensures they cook evenly and retain their juiciness. For extra tenderness, consider marinating the chicken in buttermilk for at least 30 minutes. The acidity in the buttermilk helps break down the proteins, making the chicken incredibly moist and flavorful.
Set Up the Breading Station
A well-organized breading station is key to getting that perfect, crispy coating on your chicken strips. You’ll need three shallow bowls:
- Flour Mixture: Combine all-purpose flour, cornstarch, salt, pepper, and a pinch of paprika for added flavor and color.
- Egg Mixture: Beat 2-3 eggs in a bowl. For an extra kick, you can add a few drops of hot sauce or a splash of buttermilk.
- Breadcrumb Mixture: Use panko breadcrumbs for maximum crunch. You can mix in grated Parmesan, garlic powder, and even some dried herbs like oregano or thyme.
Bread the Chicken Strips
Now it’s time to coat the chicken for that signature crispiness. Follow these steps for the best results:
- Dredge the chicken in the flour mixture, ensuring each strip is fully coated. Shake off any excess.
- Dip the floured chicken into the egg mixture, making sure it’s completely covered.
- Roll the chicken in the breadcrumb mixture, pressing down gently to ensure the coating sticks well.
For an extra-crispy finish, repeat the egg and breadcrumb step for a double coating. This adds an extra layer of crunch that makes this the best crispy chicken strips recipe around.
Choose Your Cooking Method
Now that your chicken is prepped and coated, it’s time to cook! There are a few different methods you can use to achieve crispy perfection:
- Deep-Frying: Heat oil in a deep fryer or large skillet to 350°F (175°C). Fry the chicken strips in batches for 4-5 minutes or until golden brown and cooked through. Place them on a paper towel-lined plate to drain excess oil.
- Air Frying: Preheat your air fryer to 375°F (190°C). Lightly spray the chicken strips with cooking oil and air fry them for 10-12 minutes, flipping halfway through for even crispiness.
- Baking: Preheat your oven to 400°F (200°C). Place the chicken strips on a wire rack over a baking sheet, spray with oil, and bake for 15-20 minutes or until golden and crispy.
Serve and Enjoy
Once your chicken strips are perfectly crispy, let them rest for a couple of minutes to cool slightly. Serve your crispy chicken strips with your favorite dipping sauces—ranch, honey mustard, or spicy buffalo sauce are all great choices. Pair them with classic sides like fries, coleslaw, or a fresh salad for a complete, delicious lunch.
By following these simple steps, you’ll master the art of making the ultimate crispy chicken strips recipe that’s sure to impress.
Love creamy casseroles? Use leftover chicken strips in a hearty Million Dollar Chicken Casserole for an indulgent comfort meal.
Baking vs. Frying: What’s the Best Way to Cook Crispy Chicken Strips?
Deep-Frying for Classic Crispiness
If you’re aiming for that traditional restaurant-style crunch, deep-frying is the go-to method for this crispy chicken strips recipe. When you deep-fry, the hot oil cooks the coating quickly, sealing in the juices and creating that signature golden, crispy exterior.
Pros of Deep-Frying:
- Maximum Crunch: The high heat of the oil ensures an ultra-crispy texture.
- Fast Cooking: Chicken strips cook in 4-5 minutes, making this method quick and efficient.
- Rich Flavor: Deep-frying enhances the flavor, especially if you season the oil or use flavorful breading.
Cons of Deep-Frying:
- Oil Usage: It requires a lot of oil, which can be messy and less healthy.
- Clean-Up: Dealing with leftover oil and splatters can be a hassle.
If you love indulgent, crispy chicken, deep-frying is a foolproof method for this crispy chicken strips recipe.
Air Frying for a Healthier Crunch
For those looking to cut down on oil without sacrificing crunch, air frying is a fantastic option. Air fryers circulate hot air around the chicken, giving you a crispy exterior similar to frying but with significantly less oil.
Pros of Air Frying:
- Healthier Option: You only need a light spritz of oil, reducing the fat content.
- Less Mess: No oil splatters or deep fryer clean-up.
- Consistent Results: Air fryers cook evenly, ensuring every strip is crispy.
Cons of Air Frying:
- Slightly Different Texture: While crispy, the texture might not be as rich as deep-fried chicken.
- Batch Cooking: Depending on your air fryer size, you may need to cook in smaller batches.
If you’re aiming for a healthier version of this crispy chicken strips recipe, air frying offers a great balance between crispiness and health.
Baking for an Easy, Hands-Off Method
Baking is the most convenient and hands-off method for cooking your crispy chicken strips recipe. While it might not deliver the exact crunch of frying, baking still produces delicious, crispy results—especially when using panko breadcrumbs and a wire rack.
Pros of Baking:
- Healthiest Option: No oil is necessary, making it the lightest method.
- Easy and Convenient: Just pop the chicken in the oven and let it cook.
- Great for Large Batches: You can bake a lot of chicken strips at once, perfect for feeding a crowd.
Cons of Baking:
- Less Crispy: While still crunchy, baked chicken strips may lack the deep golden color and crispiness of fried versions.
- Longer Cooking Time: Baking takes about 15-20 minutes, which is longer than frying.
If you want an easy, healthier approach to your crispy chicken strips recipe, baking is the way to go.
Which Method Is Best?
The best method depends on your priorities:
- For maximum crunch and classic flavor: Go with deep-frying.
- For a healthier, quick option: Air frying is your best bet.
- For convenience and large batches: Baking is ideal.
Whichever method you choose, this crispy chicken strips recipe will deliver delicious, satisfying results every time.
Tips and Tricks to Make Your Chicken Strips Extra Crispy

Use Panko Breadcrumbs for Maximum Crunch
If you want your crispy chicken strips recipe to deliver that restaurant-quality crunch, swap regular breadcrumbs for panko breadcrumbs. Panko is lighter and airier, creating a crispier coating that stays crunchy even after cooking. You can even mix panko with a bit of cornstarch to enhance the crispiness further.
Double-Coat for Extra Crispiness
For an ultra-crispy finish, try the double-coating method. After dipping the chicken in flour, egg, and breadcrumbs, repeat the egg and breadcrumb steps for a second layer. This extra coating locks in moisture while giving the chicken an even thicker, crunchier crust.
Let the Coated Chicken Rest Before Cooking
After breading your chicken, let it rest on a wire rack or baking sheet for about 10-15 minutes before frying or baking. This resting period helps the coating adhere better, preventing it from falling off during cooking. It also allows the flour to absorb some moisture, which leads to a crispier finish when cooked.
Maintain the Right Oil Temperature
If you’re frying your chicken, maintaining the correct oil temperature is key to achieving perfectly crispy chicken strips. Heat your oil to 350°F (175°C) and use a thermometer to keep it consistent. If the oil is too hot, the outside will burn before the inside cooks. Too cold, and your chicken strips will absorb too much oil, becoming greasy instead of crispy.
Don’t Overcrowd the Pan or Air Fryer
Whether you’re frying, baking, or air-frying, avoid overcrowding your cooking surface. Overcrowding causes the temperature to drop and prevents hot air from circulating, leading to uneven cooking and soggy chicken. Cook your crispy chicken strips in batches to ensure each piece gets the attention it deserves.
Add Cornstarch to the Flour Mixture
For an extra light and crispy coating, mix cornstarch with your flour. Cornstarch helps create a delicate, crunchy texture that stays crisp even after cooling. A good ratio is 1 part cornstarch to 3 parts flour for the perfect balance.
Spray or Brush with Oil Before Baking or Air Frying
If you’re opting for baking or air frying, lightly spray or brush the chicken strips with oil before cooking. This simple step helps the coating crisp up beautifully without the need for deep frying. For added flavor, you can use olive oil spray or avocado oil.
Season Every Layer for Flavorful Crunch
To make your crispy chicken strips recipe truly stand out, season every layer of the breading process:
- Flour Mixture: Add salt, pepper, paprika, and garlic powder.
- Egg Mixture: A splash of hot sauce or mustard adds a zesty kick.
- Breadcrumbs: Mix in Parmesan cheese, herbs, or spices for an extra flavor boost.
By seasoning each step, you’ll ensure your chicken strips are flavorful all the way through, not just on the outside.
Use a Wire Rack When Baking
When baking your crispy chicken strips, place them on a wire rack set over a baking sheet. This allows hot air to circulate around the chicken, ensuring an even, crispy coating on all sides. Without a rack, the bottom of the chicken can become soggy from trapped moisture.
Let the Chicken Rest After Cooking
After cooking, let your chicken strips rest for a couple of minutes on a wire rack or paper towel-lined plate. This allows excess oil to drain and helps the coating set, maintaining that perfect crunch.
By following these simple tips, you’ll elevate your crispy chicken strips recipe to new heights, ensuring every bite is crunchy, juicy, and full of flavor.
Want to switch things up? Turn your chicken strips into a sandwich with melted cheese and marinara using this Chicken Parmesan Sandwich recipe.
Frequently Asked Questions About Making Crispy Chicken Strips
How Do I Keep Chicken Strips Crispy After Cooking?
To keep your chicken strips crispy after cooking, place them on a wire rack instead of a plate. This allows air to circulate around the strips, preventing them from becoming soggy. If you’re not serving them immediately, you can keep the chicken warm in the oven at 200°F (93°C) until ready to serve. Avoid covering them with foil, as this traps steam and softens the crispy coating.
Can I Make This Crispy Chicken Strips Recipe in the Air Fryer?
Yes! You can easily make this crispy chicken strips recipe in an air fryer for a healthier option without sacrificing crunch. Preheat your air fryer to 375°F (190°C), lightly spray the breaded chicken strips with oil, and cook for 10-12 minutes, flipping halfway through. The result is crispy, golden chicken strips with less oil and fewer calories.
How Do I Reheat Chicken Strips Without Losing Crispiness?
To reheat your crispy chicken strips without losing that crunch, use an air fryer or oven. Preheat your oven to 375°F (190°C) and bake the strips on a wire rack for about 8-10 minutes. If using an air fryer, reheat at 350°F (175°C) for 5-7 minutes. Avoid microwaving, as it tends to make the coating soggy.
What’s the Best Oil for Frying Chicken Strips?
The best oils for frying chicken strips are those with a high smoke point, such as:
- Canola Oil
- Peanut Oil
- Vegetable Oil
- Sunflower Oil
These oils maintain a consistent temperature, ensuring your crispy chicken strips cook evenly without burning. Avoid using olive oil for deep frying, as it has a lower smoke point and can impart a bitter taste.
Can I Make a Gluten-Free Version of This Crispy Chicken Strips Recipe?
Absolutely! To make a gluten-free version of this crispy chicken strips recipe, substitute the flour with gluten-free all-purpose flour and use gluten-free breadcrumbs or crushed rice cereal for the coating. The cooking process remains the same, and you’ll still achieve that perfect, crispy texture.
How Do I Prevent the Breading from Falling Off?
To ensure the breading sticks to your chicken strips:
- Pat the chicken dry before breading to remove excess moisture.
- Follow the flour-egg-breadcrumb sequence carefully.
- Let the breaded chicken rest for 10-15 minutes before cooking. This helps the coating adhere better.
- Avoid flipping the chicken too often while cooking, as this can cause the breading to loosen.
Conclusion
This crispy chicken strips recipe is the perfect go-to for a delicious, crunchy lunch that’s easy to make and packed with flavor. Whether you’re deep-frying for that classic golden crunch, air frying for a healthier twist, or baking for a convenient, hands-off method, these chicken strips are guaranteed to be a hit. With simple ingredients, easy-to-follow steps, and plenty of tips to ensure maximum crispiness, you’ll never need another chicken strip recipe again. Serve them with your favorite dipping sauces and sides, and enjoy the ultimate comfort food that’s crispy on the outside, juicy on the inside, and irresistible all around.